In this article we’ll explore the Windows.UI.Composition API. The Composition API is a visual layer that sits between the Windows 10 XAML framework and DirectX. It gives Universal Windows Platform apps an easy access to the lower level Windows drawing stacks. The API focuses on drawing rectangles and images –with or without a XAML surface- and applying animations and effects on these. Here’s an illustration from the official documentation:
To discover the API, I created a sample app with different versions of a user control representing a clock. The clock is just an empty XAML element, the ticks and hands are drawn by the Composition API.
The first version of the clock is only composed of rectangles:
The XAML surface of the clock control is a Canvas, wrapped in a ViewBox for easy scaling. The Canvas has a name –Container- so we can access it in the code behind:
<Viewbox Stretch="Uniform">
    <Canvas x:Name="Container"
            Background="Transparent"
            Height="200"
            Width="200">
    </Canvas>
</Viewbox>
The rest of the clock is drawn and animated through Composition.
Core classes
The core of the Composition API is the Compositor, a factory class that spawns all the drawing objects, like sprites and brushes. The clock UI is drawn as a ContainerVisual, a composite image. We need some fields or variables to hold a reference to an instance of these two classes:
private Compositor _compositor;
private ContainerVisual _root;
The clock is drawn inside a XAML Canvas. The link between any XAML element and the DirectX drawing layer is established through static methods on the ElementCompositionPreview class. I packaged these calls in a reusable extension method:
public static ContainerVisual GetVisual(this UIElement element)
{
    var hostVisual = ElementCompositionPreview.GetElementVisual(element);
    var root = hostVisual.Compositor.CreateContainerVisual();
    ElementCompositionPreview.SetElementChildVisual(element, root);
    return root;
}
Here’s how the clock control initializes the Composition layer and hooks it to its XAML Canvas (remember: Container is the name for the Canvas):
_root = Container.GetVisual();
_compositor = _root.Compositor;
All visuals are created by the _compositor, and added to the _root.
Drawing Rectangles
Visuals are just rectangles, if you want to fill the rectangle with a solid color, an image, or an effect (three types of CompositionBrush), then SpriteVisual is what you need – a Visual with a Brush. Here’s how the clock draws its twelve hour ticks. For each tick, the compositor creates a new SpriteVisual, the rectangle is properly configured (size, brush, position, center of rotation, and rotation angle), and finally it’s added to the ContainerVisual:
SpriteVisual tick;
for (int i = 0; i < 12; i++)
{
    tick = _compositor.CreateSpriteVisual();
    tick.Size = new Vector2(4.0f, 20.0f);
    tick.Brush = _compositor.CreateColorBrush(Colors.Silver);
    tick.Offset = new Vector3(98.0f, 0.0f, 0);
    tick.CenterPoint = new Vector3(2.0f, 100.0f, 0);
    tick.RotationAngleInDegrees = i * 30;
    _root.Children.InsertAtTop(tick);
}
The hour, minute, and second hands are created in exactly the same way. Here’s the code for the hour hand, its initial position is twelve-o-clock:
_hourhand = _compositor.CreateSpriteVisual();
_hourhand.Size = new Vector2(4.0f, 100.0f);
_hourhand.Brush = _compositor.CreateColorBrush(Colors.Black);
_hourhand.CenterPoint = new Vector3(2.0f, 80.0f, 0);
_hourhand.Offset = new Vector3(98.0f, 20.0f, 0);
_root.Children.InsertAtTop(_hourhand);
The hour and minute hands are not animated, we just update their rotation angle every now and then:
private void SetHoursAndMinutes()
{
    var now = DateTime.Now;
    _hourhand.RotationAngleInDegrees = (float)now.TimeOfDay.TotalHours * 30;
    _minutehand.RotationAngleInDegrees = now.Minute * 6;
}
Defining Animations
For the second hand we defined an animation on its rotation angle. We let the Compositor factory create a ScalarKeyFrameAnimation, configured it by inserting key frames and giving it a duration, an then started the animation:
var now = DateTime.Now;
var animation = _compositor.CreateScalarKeyFrameAnimation();
var seconds = (float)(int)now.TimeOfDay.TotalSeconds;
animation.InsertKeyFrame(0.00f, seconds * 6);
animation.InsertKeyFrame(1.00f, (seconds + 1) * 6);
animation.Duration = TimeSpan.FromMilliseconds(900);
// _secondhand.StartAnimation("RotationAngleInDegrees", animation);
_secondhand.StartAnimation(nameof(_secondhand.RotationAngleInDegrees), animation);
We did the calculation in the app’s code, but you may delegate some of that work to the Composition API. Every CompositionAnimation instance allows you to define different types of parameters. These parameters can be used in string expressions, such as the expressions that calculate the value of a key frame. Here’s an alternative for (part of) the previous code snippet:
animation.SetScalarParameter("start", seconds * 6);
animation.InsertExpressionKeyFrame(0.00f, "start");
animation.SetScalarParameter("delta", 6.0f);
animation.InsertExpressionKeyFrame(1.00f, "start + delta");
The animation is triggered every second by a timer, and lasts for 900 milliseconds, so the hand stops briefly at every second tick. In that short interval between the two animations, we update the rotation angle of the hour and minute hands. We do this not only because it looks nice, but also because we wanted an excuse to introduce you to the CompositionScopedBatch class.
Using a Scoped Batch
An individual animation has no Ended event. But you can create a batch with a group of animations. The batch contains all the animations that are defined between its creation and a call to its End() method. When all animations are completed, the batch raises its Completed event. In the clock control, we wrapped the second hand animation in a batch, and registered an event handler to update the hour and minute hands:
_batch = _compositor.CreateScopedBatch(CompositionBatchTypes.Animation);
var animation = _compositor.CreateScalarKeyFrameAnimation();
// animation configuration
// ...
_secondhand.StartAnimation("RotationAngleInDegrees", animation);
_batch.End();
_batch.Completed += Batch_Completed;
private void Batch_Completed(object sender, CompositionBatchCompletedEventArgs args)
{
    _batch.Completed -= Batch_Completed;

    SetHoursAndMinutes();
}
When you run the app in Visual Studio you’ll see a fully functional clock. When you open the Live Visual Tree of the clock, you’ll see that the Container canvas has no XAML children.
Mixing XAML and Composition Visuals
Any XAML that you add inside the Canvas –declaratively or programmatically- will be displayed underneath the Composition API’s visual layer. Here’s the declaration of the Face – the circular background of the clock:
<Viewbox Stretch="Uniform">
    <Canvas x:Name="Container"
            Background="Transparent"
            Height="200"
            Width="200">
        <Ellipse x:Name="Face"
                    Height="200"
                    Width="200"
                    Canvas.Left="0"
                    Canvas.Top="0" />
    </Canvas>
</Viewbox>
And here’s how a background image is programmatically added as a XAML Image. Both Face and BackgroundImage become part of the XAML Visual Tree:
public Brush FaceColor { get; set; } = new SolidColorBrush(Colors.Transparent);
public ImageSource BackgroundImage { get; set; }

private void Clock_Loaded(object sender, RoutedEventArgs e)
{
    Face.Fill = FaceColor;

    // Composition API stuff.
    // ...

    // Add XAML element.
    if (BackgroundImage != null)
    {
        var xaml = new Image();
        xaml.Source = BackgroundImage;
        xaml.Height = 200;
        xaml.Width = 200;
        Container.Children.Add(xaml);
    }
}
So you can combine Composition API drawings and XAML elements into the same surface.
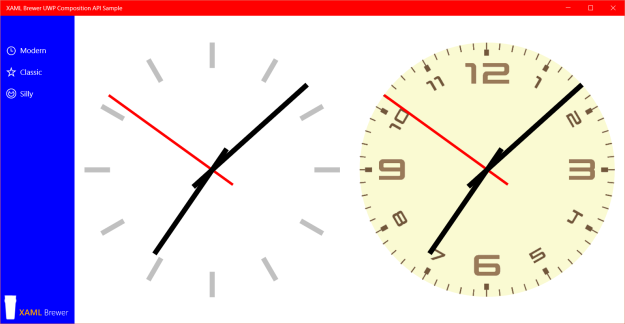
This is the declaration of the clocks on the main page:
<controls:Clock />
<controls:Clock ShowTicks="False"
                BackgroundImage="ms-appx:///Assets/modern_face.png"
                FaceColor="LightGoldenrodYellow" />
And here’s the corresponding UI:
Adding Images
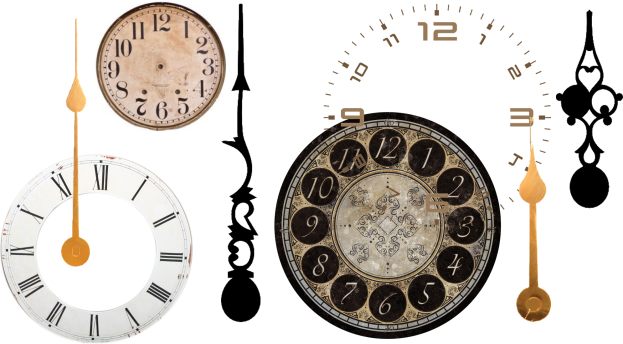
A second version of the Clock control allows you to use images for the clock face and the hour and minute hands, such as these:
I provided some properties for the images, each with a default Uri:
public Uri FaceImage { get; set; } = new Uri("ms-appx:///Assets/roman_face.jpg");
public Uri HourHandImage { get; set; } = new Uri("ms-appx:///Assets/hour_hand.png");
public Uri MinuteHandImage { get; set; } = new Uri("ms-appx:///Assets/minute_hand.png");
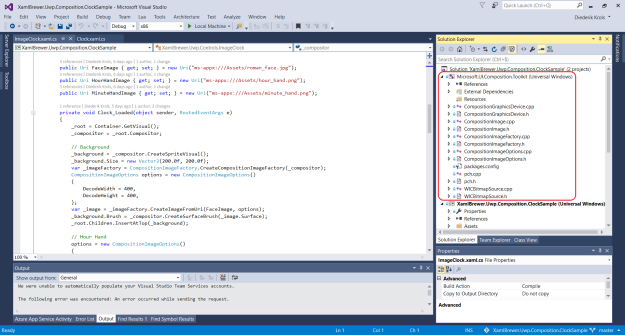
When you want to work with image files in the Composition API, your project needs a reference to the Windows.UI.Composition.Toolkit. There’s no NuGet package for this [I assume that the functionality will become part of the API in the near future] so I copied the C++ source from the official Composition API Samples on GitHub.
The toolkit comes with a CompositionImageFactory that allows you to read and decode images from a Uri, and use these as a SurfaceBrush for a SpriteVisual. Here’s the sample app code for loading the clock’s background image:
_background = _compositor.CreateSpriteVisual();
_background.Size = new Vector2(200.0f, 200.0f);
var _imageFactory = CompositionImageFactory.CreateCompositionImageFactory(_compositor);
CompositionImageOptions options = new CompositionImageOptions()
{
    DecodeWidth = 400,
    DecodeHeight = 400,
};
var _image = _imageFactory.CreateImageFromUri(FaceImage, options);
_background.Brush = _compositor.CreateSurfaceBrush(_image.Surface);
_root.Children.InsertAtTop(_background);
Here’s the code for the hour hand:
options = new CompositionImageOptions()
{
    DecodeWidth = 72,
    DecodeHeight = 240,
};

_hourhand = _compositor.CreateSpriteVisual();
_hourhand.Size = new Vector2(24.0f, 80.0f);
_image = _imageFactory.CreateImageFromUri(HourHandImage, options);
_hourhand.Brush = _compositor.CreateSurfaceBrush(_image.Surface);
_hourhand.CenterPoint = new Vector3(12.0f, 70.0f, 0);
_hourhand.Offset = new Vector3(88.0f, 30.0f, 0);
_root.Children.InsertAtTop(_hourhand);
Make sure that such images have a transparent background. Paint.NET is an excellent tool for this: click with the magic wand tool on the background, and press ‘delete’. But of course you may also opt for PhotoShop, and a designer.
Here’s an example of two instances of the same clock control, each with a different set of images:
Adding some fun
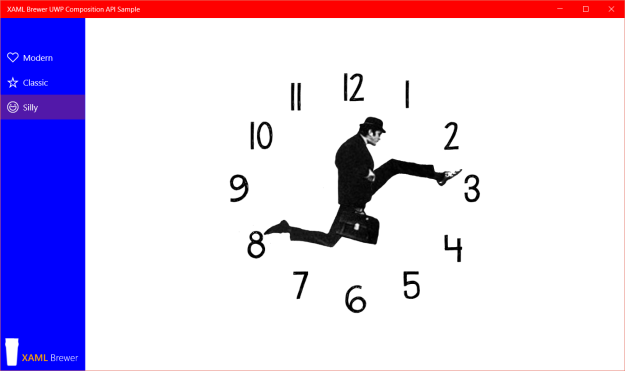
When looking for clock images for the sample app, I came across this awesome DIY Silly Walk clock. It has four layers of images: the background, the two hands (well … legs in this case), and the body. Instead of calculating the individual positions, the decoding heights and widths, and the rotation center in code, I gave all four images the same size, and positioned them correctly.
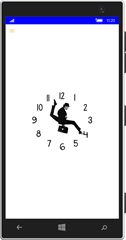
The Silly Walk clock comes with a lot less code than the previous ones, but it brings a lot more fun. Here’s how it looks like on the PC:
Here’s how all of the clocks in the sample app look like on a Windows Phone 10 (emulator):
 |
 |
 |
The Source
All of the source code, including image assets and a version of the C++ Composition Toolkit, lives here on GitHub.
Enjoy!



Hey Diederik,
quick tip: instead of
_secondhand.StartAnimation(“RotationAngleInDegrees”, animation);
you can use
_secondhand.StartAnimation(nameof(_secondhand.RotationAngleInDegrees), animation);
no more magic string and chance of typos 🙂
LikeLike
Thanks Nico, good catch!
LikeLike