In this article we demonstrate how to use SkiaSharp in a WinUI 3 desktop application. We present
- some Hello World samples,
- a WinUI 3 version of the entire official SkiaSharp samples gallery, and
- a more elaborated SKCanvas demo.
Skia is a powerful open-source 2D graphics library created by Google, who use it extensively in products such as Android, Chrome, Chrome OS, and Flutter. SkiaSharp is the library that brings this graphics rendering engine to the .NET platform. SkiaSharp provides cross-platform bindings for [take a deep breath] all .NET flavors, Tizen, Android, all things Apple (iOS, tvOS, watchOS, macOS, Mac Catalyst), WinUI 3, Windows Desktop (WinForms and WPF), UWP, Web Assembly, and Uno Platform.
SkiaSharp is supported by all .NET development ecosystems. Some technologies (like ‘classic’ Xamarin) encourage its use, while others (like Avalonia UI) are largely built on top of it.
With such a broad potential target area, it should not come as a surprise that SkiaSharp is the foundation of a large number of open-source .NET components and libraries. Some of these already appeared in our blog:
- Mapsui for displaying maps,
- QuestPDF for generating PDF documents, and
- OxyPlot and Microcharts for displaying charts and diagrams.
For the larger UI-focused libraries it definitely makes sense to target just one stable technology-neutral rendering engine.
If you’re looking for documentation, the SkiaSharp Xamarin Forms tutorials are a great way to start. There’s a clean -almost sterile- API reference in the dotnet docs. For more details but less C#, we recommend the user docs and the overview on the Skia site itself: just take a look at these nice explanations of SKPath and SKPaint.
If you’re looking for working sample code, there’s the SkiaSharp Gallery app demonstrating pretty much all features of the package. There’s a version for each supported technology stack … except WinUI 3 🙄:
Don’t worry, we will fix this 😁. Let’s first get our hands dirty with some Hello World samples.
Hello Worlds
Following the true ‘Hello World’ philosophy, the official basic sample just writes some text. Here’s the WinUI 3 version:
- Import the namespace in your XAML view:
xmlns:skiasharp="using:SkiaSharp.Views.Windows"
- Add an SKXamlCanvas:
<skiasharp:SKXamlCanvas x:Name="xamlCanvas"
                        VerticalAlignment="Stretch"
                        HorizontalAlignment="Stretch"
                        PaintSurface="OnPaintSurface" />
- In your code behind, implement the OnPaintSurface event handler. It will be called whenever rendering or rerendering is required:
private void OnPaintSurface(object sender, SKPaintSurfaceEventArgs e)
{
    SKCanvas canvas = e.Surface.Canvas;

    canvas.Clear(SKColors.Transparent);

    // Draw some text
    string text = "SkiaSharp on WinUI";
    var paint = new SKPaint
    {
        Color = SKColors.Gold,
        IsAntialias = true,
        Style = SKPaintStyle.Stroke,
        StrokeWidth = 2,
        TextAlign = SKTextAlign.Center,
        TextSize = 58
    };
    var bounds = new SKRect();
    paint.MeasureText(text, ref bounds);
    var coord = new SKPoint(e.Info.Width / 2, (e.Info.Height + bounds.Height) / 2 ); // Origin = Bottom Left
    canvas.DrawText(text, coord, paint);
}
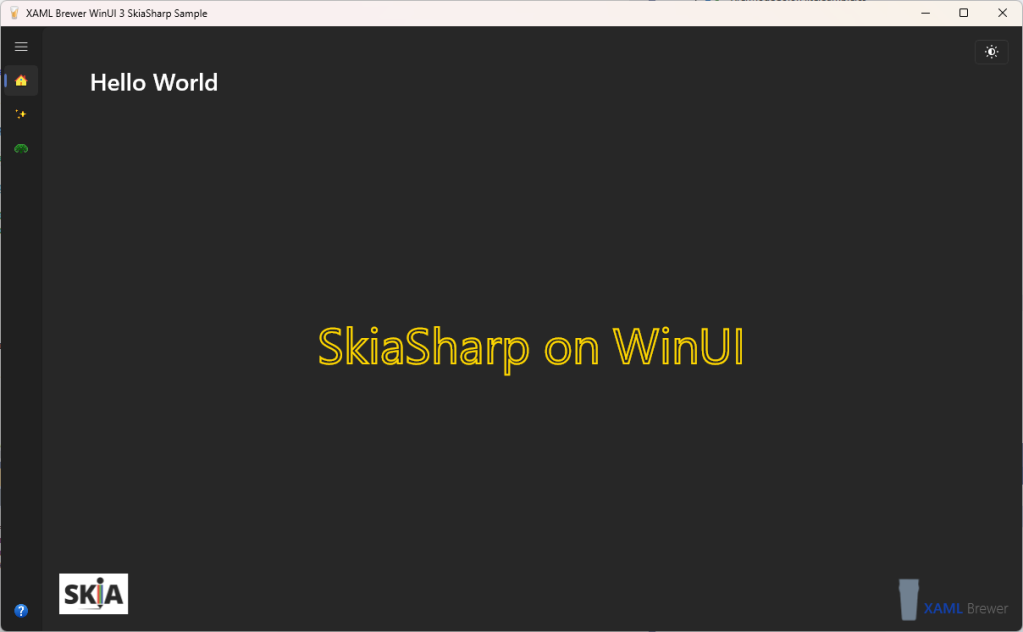
The above code places a piece of text in the middle of the canvas by means of one of the many Draw*() methods. The text is drawn with an SKPaint (think XAML brush). Its size is measured into an SKRect that is used to calculate the SKPoint coordinate of the text’s position in the canvas. Here’s how the result looks like:
As a XAML fan, we wanted to find out if SKXamlCanvas content can also be defined declaratively. And yes it does. Here’s part of an example:
<Path Fill="OrangeRed"
        Canvas.Left="180"
        Canvas.Top="250">
    <Path.Data>
        <PathGeometry>
            <PathFigure StartPoint="0,0"
                        IsClosed="True">
                <QuadraticBezierSegment Point1="50,0"
                                        Point2="50,-50" />
                <QuadraticBezierSegment Point1="100,-50"
                                        Point2="100,0" />
                <LineSegment Point="50,0" />
                <LineSegment Point="50,50" />
            </PathFigure>
        </PathGeometry>
    </Path.Data>
</Path>
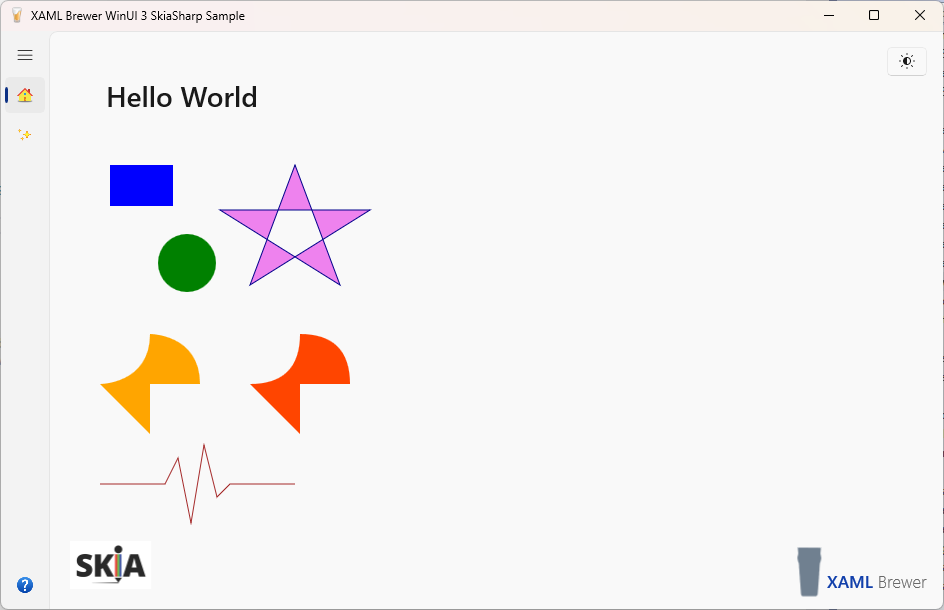
And this is what the full sample looks like:
Text and paths can be done in plain XAML too, so let’s demonstrate a SkiaSharp differentiator. While XAML supports SVG Paths, it does not support SVG files. Here’s how to use SkiaSharp to load and display an SVG file – it requires the SkiaSharp.Svg extension package:
// Read and draw an SVG file
var svg = new SKSvg();
svg.Load(Path.Combine(Package.Current.InstalledLocation.Path, "Assets/WinUI_Logo.svg"));
var coord = new SKPoint(80, (e.Info.Height - svg.ViewBox.Height) / 2); // Origin = Top Left
//var coord = new SKPoint(80, (e.Info.Height - svg.Picture.CullRect.Height) / 2);
canvas.DrawPicture(svg.Picture, coord);
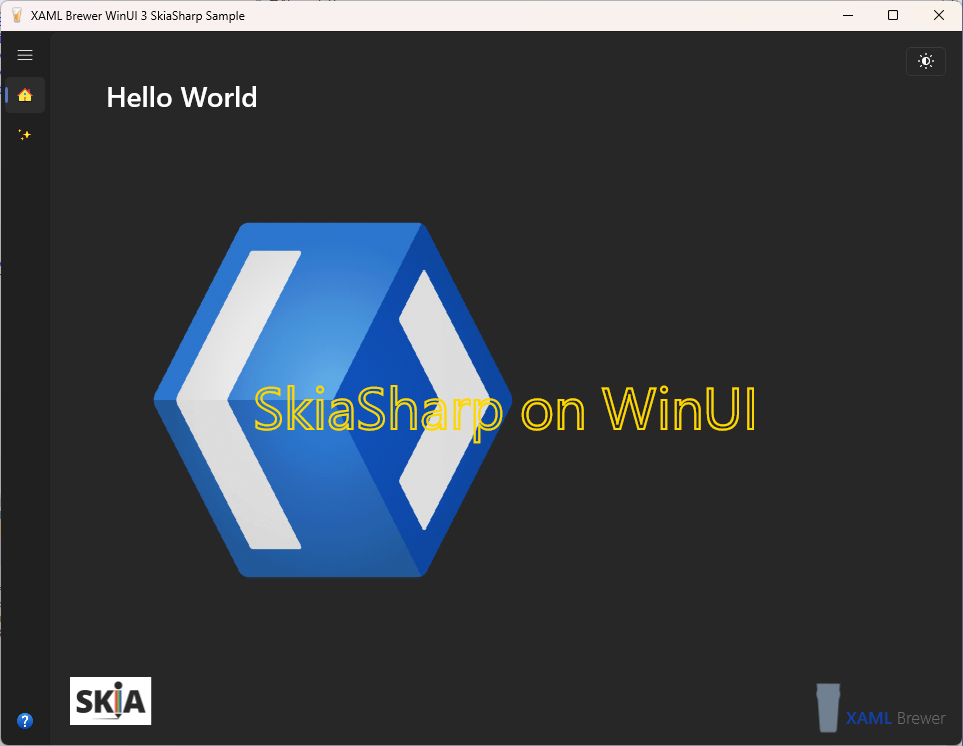
Here’s the result when this code is blended with our first Hello World sample:
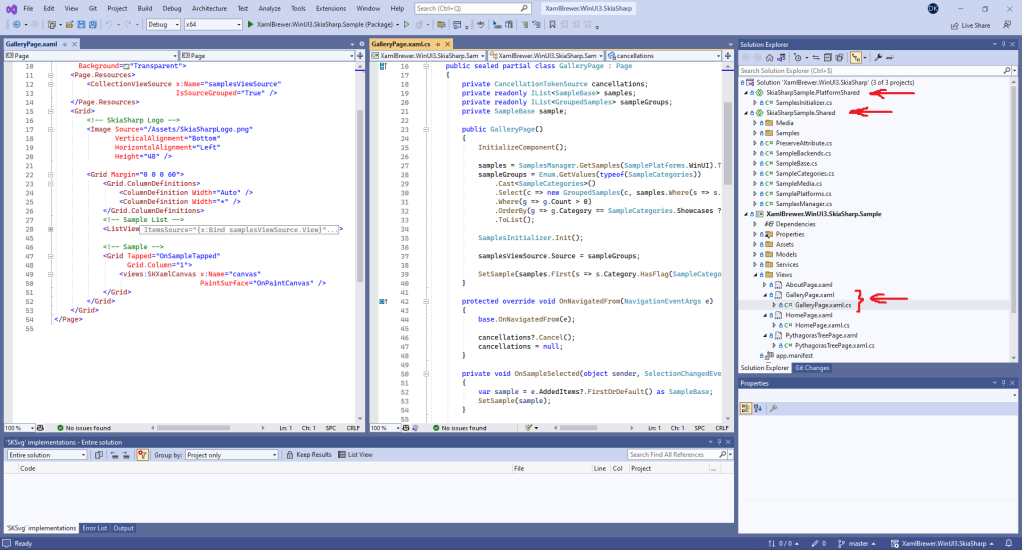
Migrating the Samples Gallery
Once we saw these Hello World samples running on WinUI 3, we boldly decided to migrate the whole sample library. We expected some caveats, but the operation took just a couple of minutes. We copied two core shared projects (SkiaSharpSample.Platform.Shared and SkiaSharpSample.Shared) into our solution, and added a Gallery page to our sample project. Its source code is based on the UWP version:
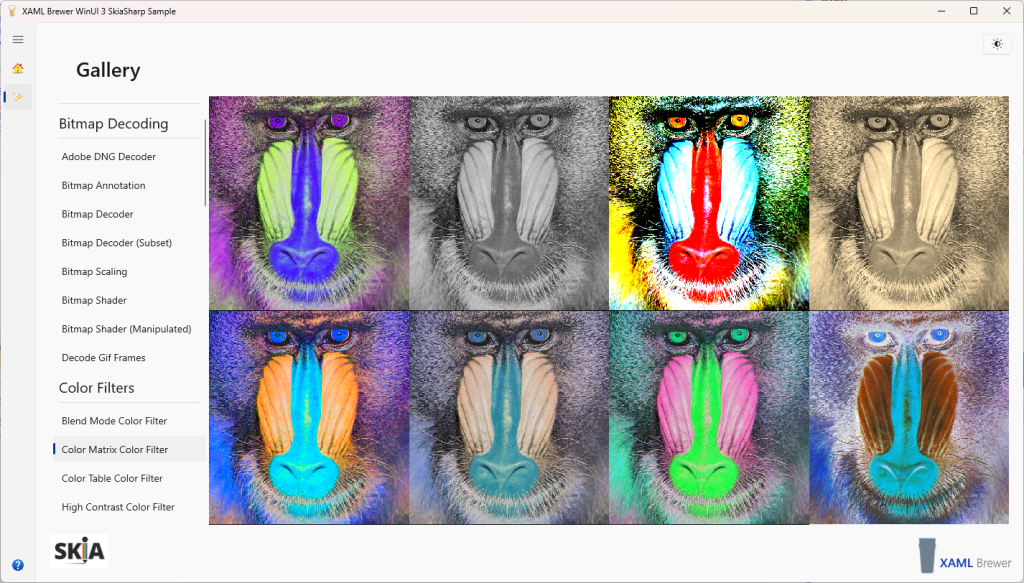
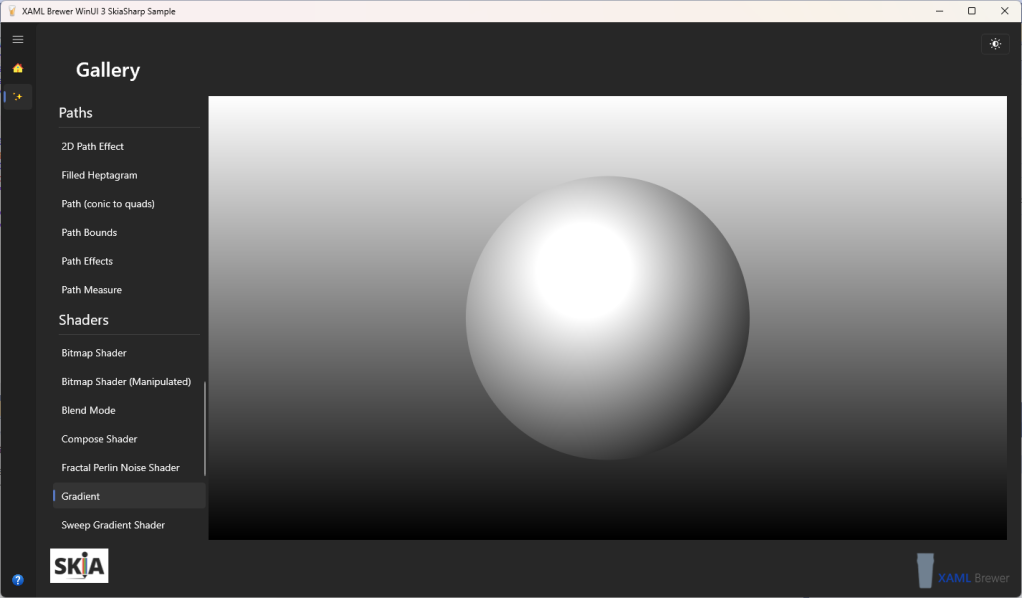
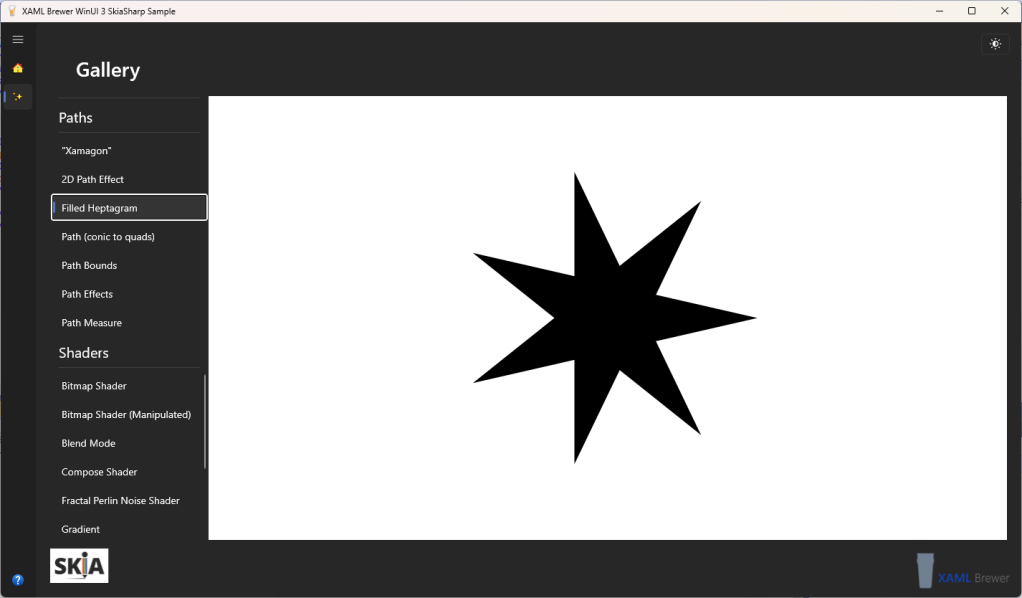
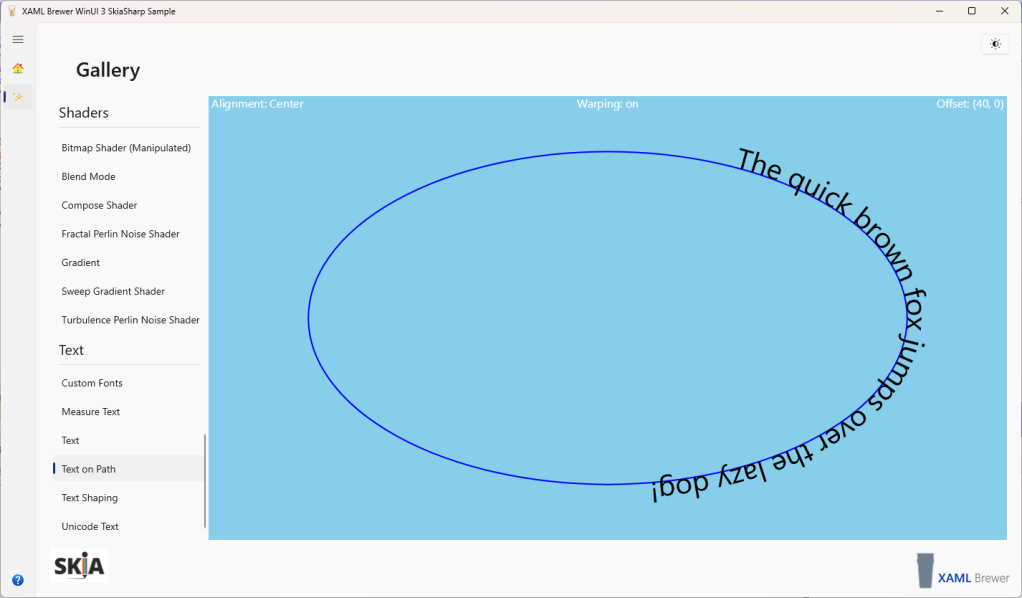
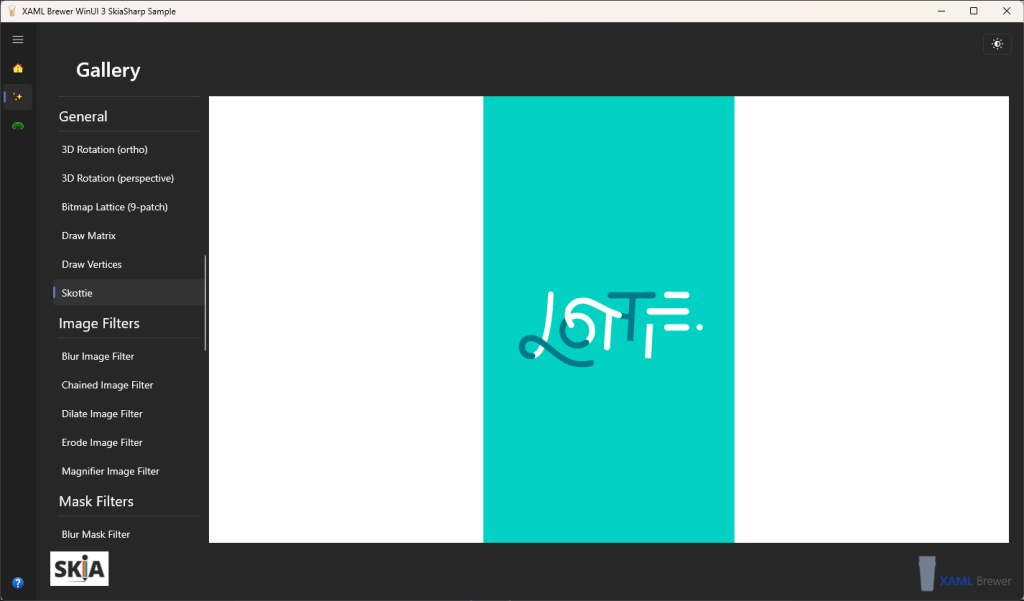
All samples run fine on WinUI 3, including working with SVG paths, text (using HarfBuzz), bitmaps, shaders, gradients, Skottie (a Lottie animation player!), and much more. Here are a few screenshots:

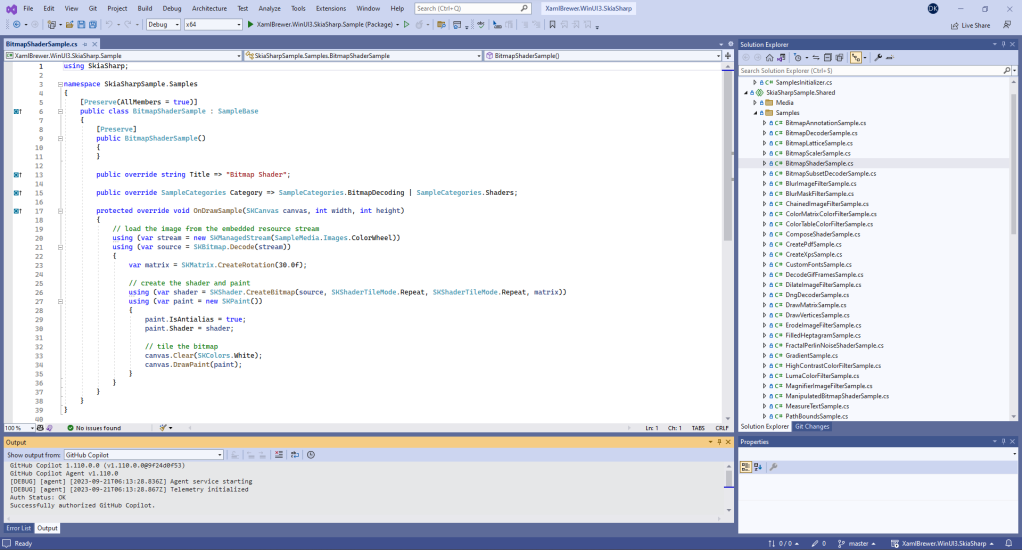
The samples are small, focused, and well decorated with comments:
The gallery’s framework code is straightforward. It’s easy to add your own samples to the source, if you want.
Drawing a Pythagorean Tree
After playing with some of these pre-cooked samples, we were eager to get first-hand experience by building something from scratch. In search for inspiration, we encountered the Pythagorean Tree.
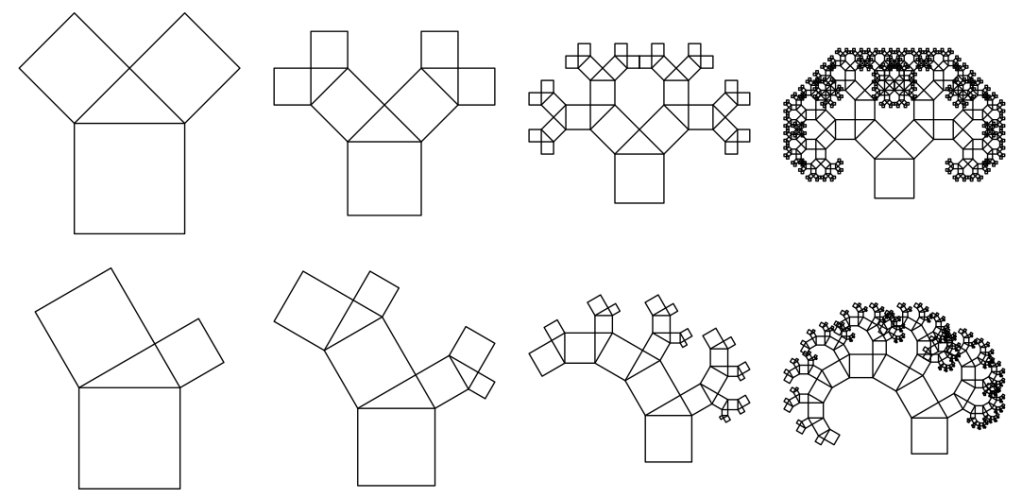
The Pythagorean Tree is a fractal that starts with a square node with a right triangle on top of it – illustrating Pythagoras’ Theorem. And so it begins:
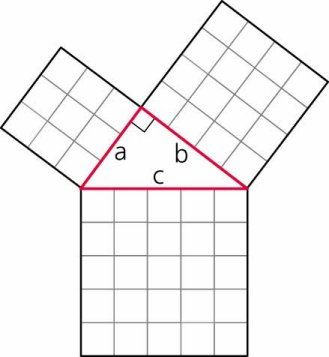
The node is then recursively repeated accross the triangle’s sides into a fractal:
Here’s the signature of our recursive DrawNode() method, it gets the SKCanvas, an SKPaint, the base rectangle, the left angle of the right triangle, and finally the recursion depth (we’re not into infinite loops here):
private static void DrawNode(
    SKCanvas canvas,
    SKPaint paint,
    SKRect rect,
    float angle,
    int steps)
{
    // ...
}
Here’s how we draw the root (well, actually the trunk) node:
var side = 120f;
var angle = 36f;
var paint = new SKPaint
{
    Color = SKColors.Brown,
    IsAntialias = true
};

canvas.Translate(e.Info.Width / 2, e.Info.Height - side);

var r = new SKRect(0, 0, side, side);
DrawNode(canvas, paint, r, angle, 15);
Notice that we draw the rectangle at the position (0,0). That’s OK because we conveniently translated the origin to the bottom centre of the canvas.
In the implementation of DrawNode() we draw the bottom square, calculate the side of the two other squares, and execute the two recursive calls. Except for the recursion depth, each of the recursive calls takes the parameters unaltered – even the rectangle. In hindsight we could have left these entirely out of DrawNode(). Before each call, we Save() the current state of the canvas (the reference coordinate system a.k.a. the matrix). Then we Translate(), Rotate(), and Scale() the canvas itself instead of the rectangle. After the recursive call we Restore() the canvas again to get back to where we started:
private static void DrawNode(SKCanvas canvas, SKPaint paint, SKRect rect, float angle, int steps)
{
    // Recursion control
    steps--;
    if (steps == 0)
    {
        return;
    }

    // Trigonometrics
    var sine = (float)Math.Sin(angle * 2 * Math.PI / 360);
    var cosine = (float)Math.Cos(angle * 2 * Math.PI / 360);

    // Trunk
    canvas.DrawRect(rect, paint);

    // Left branch
    canvas.Save();
    var leftSide = (float)(rect.Width * cosine);
    canvas.Translate((float)(-leftSide * sine), (float)(-leftSide * cosine));
    canvas.RotateDegrees(-angle);
    canvas.Scale(cosine);
    DrawNode(canvas, paint, rect, angle, steps);
    canvas.Restore();

    // Right branch
    canvas.Save();
    var rightSide = (float)(rect.Width * sine);
    canvas.Translate((float)((rightSide + leftSide) * cosine), (float)(-(rightSide + leftSide) * sine));
    canvas.RotateDegrees(90 - angle);
    canvas.Scale(sine);
    DrawNode(canvas, paint, rect, angle, steps);
    canvas.Restore();
}
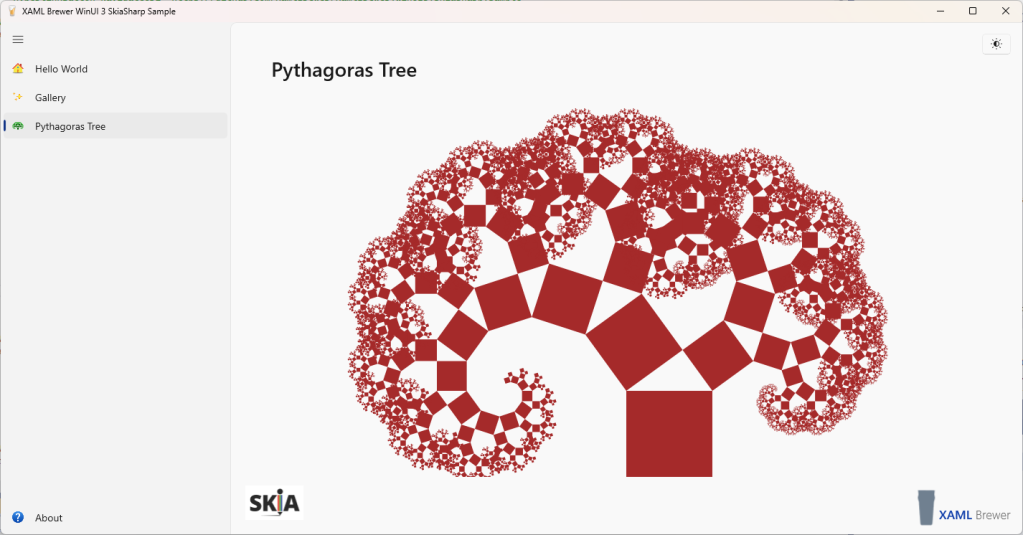
Here’s how it looks like. The result is as clean and beautiful as its source code:
We enjoyed working with SkiaSharp-based packages before, and now we enjoyed taking our first programming steps with it.
Our sample app lives here on GitHub.
Enjoy!

Nice article.
Could be addition to the blog post that Uno Platform also uses SkiaSharp, (especially as we contribute to it a lot) for targeting some platforms such as Linux, WPF and WebAssembly , or even make it possible for mobile scenarios – i.e. Lottie on iOS/Android/Catalyst/
https://github.com/unoplatform/uno
LikeLike