In this article we present an Android and Windows Desktop app written with Avalonia UI. The app allows you to
- pick whatever image – but preferably one with a glass of beer in it,
- calculate the average color of the image’s pixels,
- find the nearest official beer color to that image, and
- visually validate the result with a slider through the official beer colors.
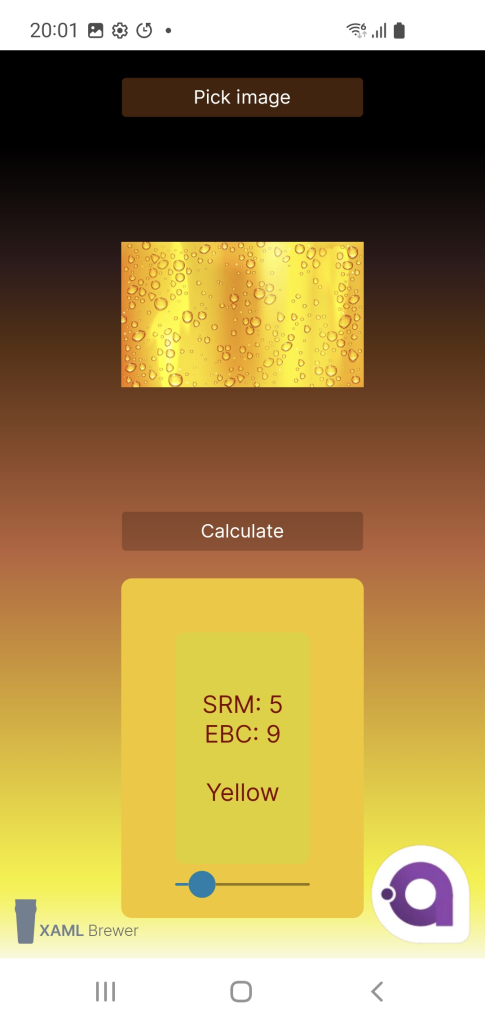
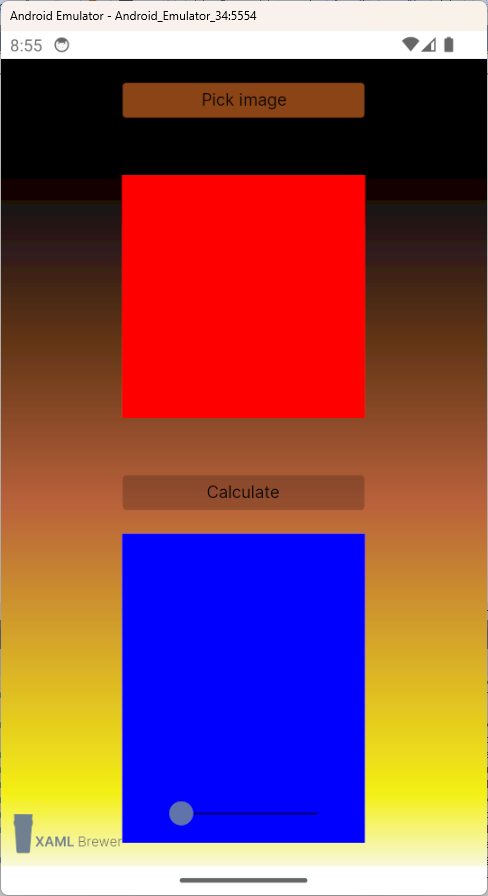
After a version with WinUI 3 and a version with Uno Platform, this is the third incarnation of our Beer Color Meter. This is how it looks on my old phone:

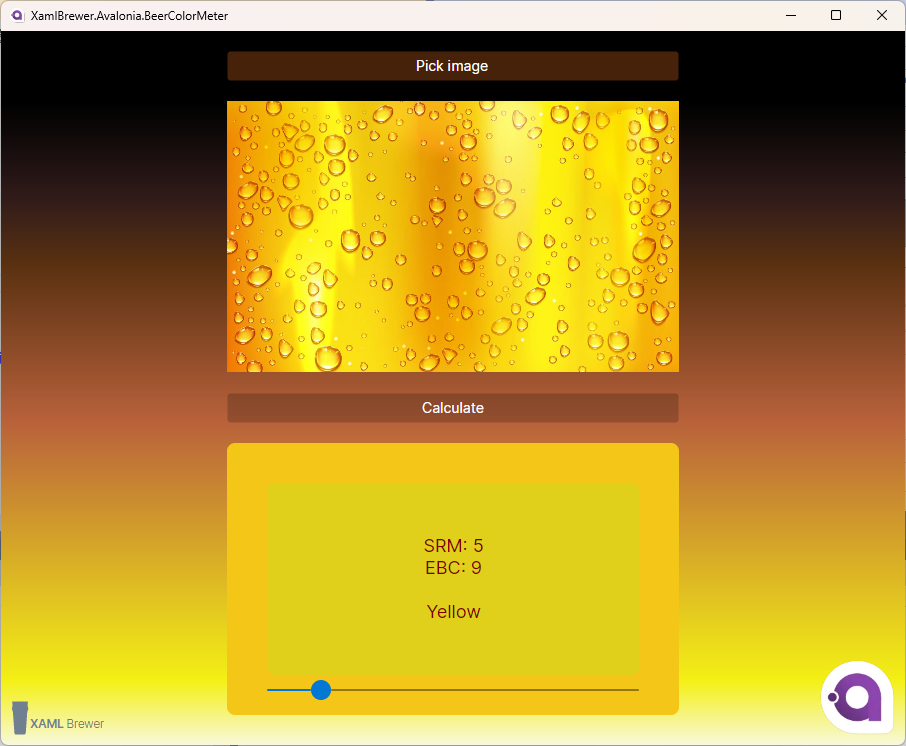
And here’s how it looks like on Windows:
Beer Color Meter’s concepts, Model, and Data Access Layer are still identical to the WinUI version – we’re not going into these details again. Our original version used Windows Community’s Toolkit ImageCropper to allow the user to indicate the relevant part of the picture (the beer). We did not find an alternative for this control, so we will -just like in our Uno version– consider all the pixels of the full source image instead of a selection.
Getting started with Avalonia UI
This is our first project with Avalonia UI, so we had to configure our development box. Since we regularly update and run the Uno Check Tool, we were pretty confident that all Android-related configurations are OK. According to Avalonia’s documentation it suffices to
- install the solution templates (“dotnet new install Avalonia.Templates”), and
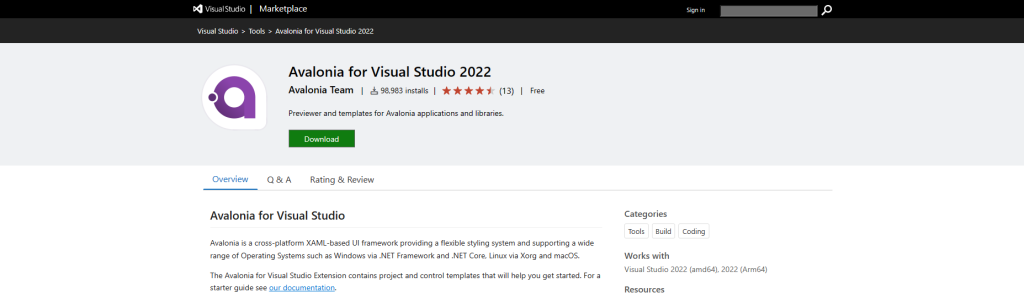
- install the Avalonia VSIX in Visual Studio.
Avalonia UI comes with documentation, sample apps, an interactive playground, and Awesome Avalonia, a curated list of libraries and resources.
Avalonia UI is based on WPF – with which we have some experience. There’s specific guidance for converting applications from WPF. Avalonia delegates rendering of its UI to SkiaSharp – with which we also have some experience.
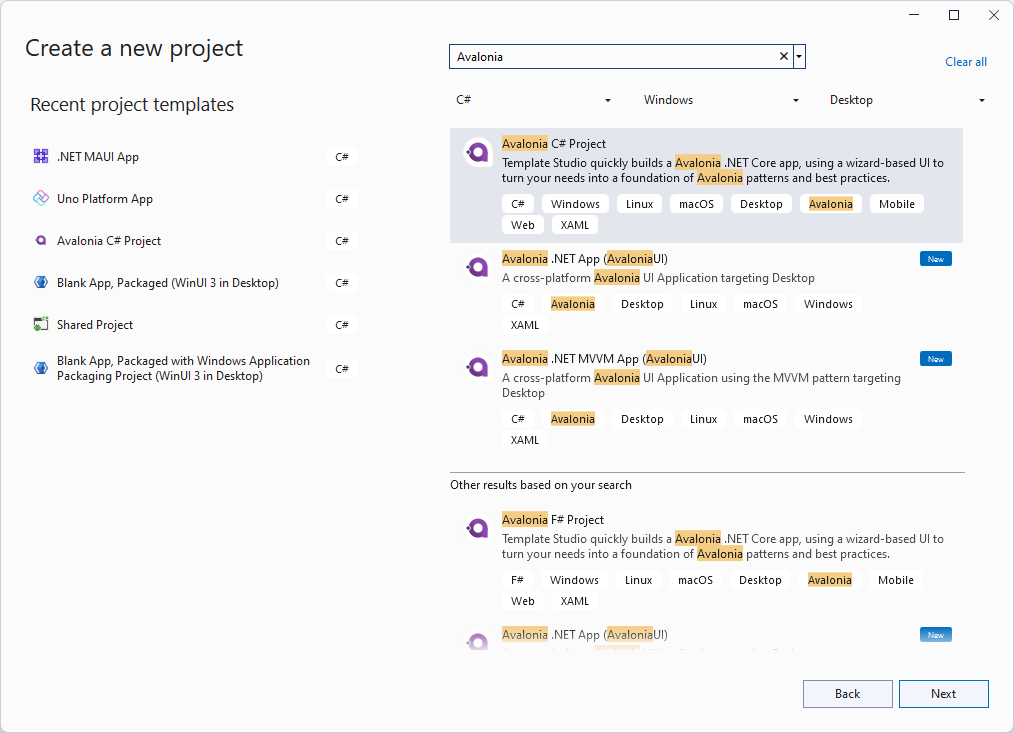
When creating a new Avalonia UI solution in Visual Studio, just let their implementation of Template Studio guide you to configure it:
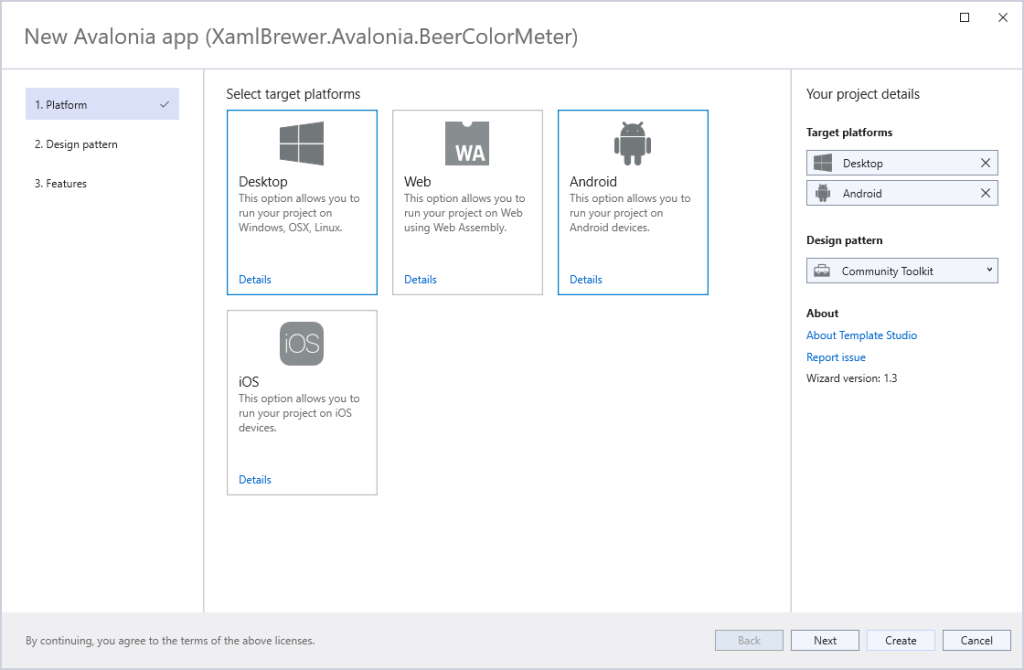
Compared to other cross platform ecosystems, an Avalonia UI solution is remarkably straightforward, with one core project and one head per target operating system:
We didn’t need to touch any of the platform projects for our Beer Color Meter.
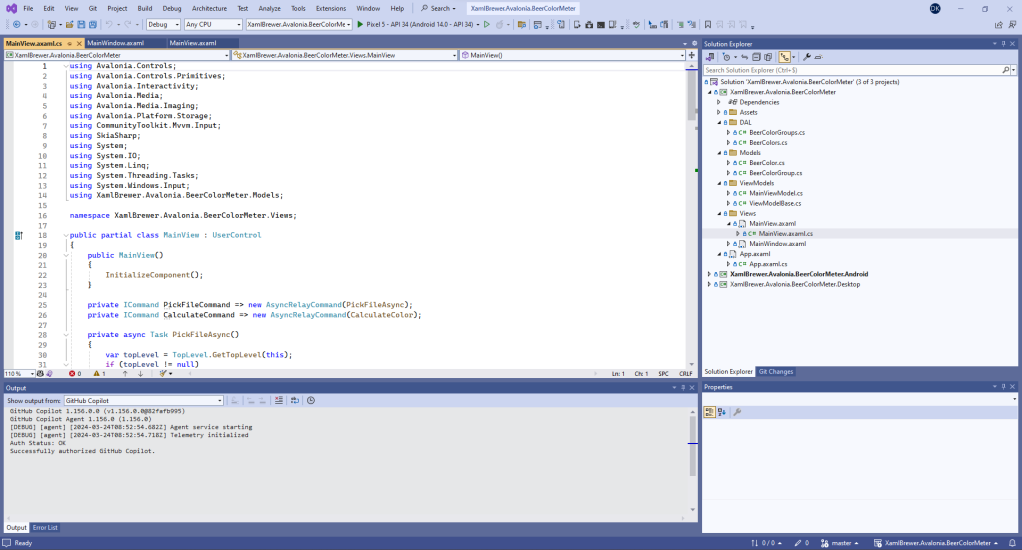
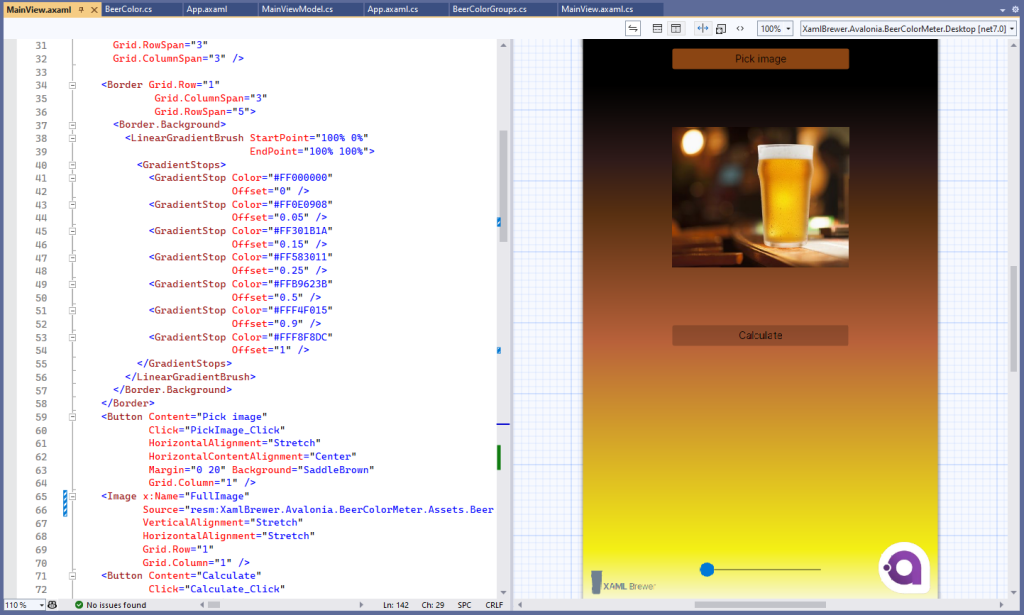
Unlike most of the other modern XAML environments, Avalonia UI comes with a designer:
Running the code
Start up one of the platform head projects (in our case Desktop or Android) to run your code. For Android specifics, check out our blog post on Uno Platform. You can run in the Android Emulator, or on a connected physical device.
Porting the WinUI code
Just like we expected, Beer Color Meter’s concepts, Model, and Data Access Layer are identical to the WinUI version. After all, these are just plain C# classes.
Since Avalonia UI is not based on WinUI but on WPF, there were some differences in the XAML:
- Each page is implanted as a UserControl:
<UserControl xmlns="https://github.com/avaloniaui"
             xmlns:x="http://schemas.microsoft.com/winfx/2006/xaml"
             xmlns:d="http://schemas.microsoft.com/expression/blend/2008"
             xmlns:mc="http://schemas.openxmlformats.org/markup-compatibility/2006"
             xmlns:vm="clr-namespace:XamlBrewer.Avalonia.BeerColorMeter.ViewModels"
             mc:Ignorable="d" d:DesignWidth="500" d:DesignHeight="800"
             x:Class="XamlBrewer.Avalonia.BeerColorMeter.Views.MainView"
             x:DataType="vm:MainViewModel">
  <Design.DataContext>
    <!-- This only sets the DataContext for the previewer in an IDE,
         to set the actual DataContext for runtime, set the DataContext property in code (look at App.axaml.cs) -->
    <vm:MainViewModel />
  </Design.DataContext>

  <Grid>
    <!-- ... -->
  </Grid>
</UserControl>
- The LinearGradientBrush’s content is made of GradientStops instead of a GradientStopCollection:
<LinearGradientBrush StartPoint="100% 0%"
                      EndPoint="100% 100%">
  <GradientStops>
    <GradientStop Color="#FF000000"
                  Offset="0" />
    <!-- ... -->
    <GradientStop Color="#FFF8F8DC"
                  Offset="1" />
  </GradientStops>
</LinearGradientBrush>
- The Grid control has no CornerRadius, so we had to wrap it in a Border:
<Border x:Name="Result"
      HorizontalAlignment="Stretch"
      VerticalAlignment="Stretch"
      CornerRadius="8"
      Grid.Row="3"
      Grid.Column="1">
  <Grid>
    <!-- ... --/
  </Grid>
</Border>
- The syntax for referencing to a resource (e.g. in the Image control) is different from WinUI
<Image x:Name="FullImage"
        Source="resm:XamlBrewer.Avalonia.BeerColorMeter.Assets.Beer.jpg" />
Avalonia UI prefers the MVVM pattern. Out-of-the-box it offers a choice between ReactiveUI and Microsoft Toolkit MVVM. We went for the latter – with which we have some experience 😉:

By default a MainViewModel is created, it derives from ViewModelBase, an ObservableObject.
public partial class MainViewModel : ViewModelBase
{ }

public class ViewModelBase : ObservableObject
{ }
The MainViewModel provides design-time data to the designer (as shown in the UserControl snippet above). It is also set as data context to the user control:
if (ApplicationLifetime is IClassicDesktopStyleApplicationLifetime desktop)
{
    desktop.MainWindow = new MainWindow
    {
        DataContext = new MainViewModel()
    };
}
else if (ApplicationLifetime is ISingleViewApplicationLifetime singleViewPlatform)
{
    singleViewPlatform.MainView = new MainView
    {
        DataContext = new MainViewModel()
    };
}
In almost all cases we would be happy with this, but Beer Color Meter is -on purpose- a less trivial app. Both its button actions need direct access to the UI thread:
- the Pick Image button needs to provide the TopLevel -the visual root- to open a file picker, and
- the Calculate button needs access to the Image control, to calculate the average color of its pixels.
There’s no clean way to do these things from a ViewModel, so wrote the code in the View. It’s bound to the Click events:
<Button Content="Pick image"
        Click="PickImage_Click" />
MVVM Toolkit’s AsyncRelayCommand seemed appropriate to hook the asynchronous call to the click event handler:
private ICommand PickFileCommand => new AsyncRelayCommand(PickFileAsync);

private void PickImage_Click(object sender, RoutedEventArgs e)
{
    PickFileCommand.Execute(null);
}
Here’s Avalonia’s way to open a file picker:
private async Task PickFileAsync()
{
    var topLevel = TopLevel.GetTopLevel(this);
    if (topLevel != null)
    {
        var files = await topLevel.StorageProvider.OpenFilePickerAsync(new FilePickerOpenOptions { AllowMultiple = false });
        if (files != null && files.Any())
        {
            var file = files.First();
            await OpenFile(file);
        }
    }
}
Via a Bitmap instance, we provide the content of the selected file as Source to the Image control:
private async Task OpenFile(IStorageFile file)
{
    if (file != null)
    {
        await using var stream = await file.OpenReadAsync();
        FullImage.Source = new Bitmap(stream);
    }
}
Accessing image pixels
Avalonia’s own Bitmap does not expose its pixels, but we know that Avalonia uses SkiaSharp as its rendering engine. So it should not come as a surprise that we chose SkiaSharp’s SKBitmap as the main actor in our pixel color calculation algorithm:
if (FullImage.Source is not Bitmap bitmap)
{
    return;
}

var stream = new MemoryStream();
bitmap.Save(stream);
var skb = SKBitmap.Decode(stream.ToArray());

// Calculate average color
byte[] sourcePixels = skb.Bytes;
var nbrOfPixels = sourcePixels.Length / 4;
int color1 = 0, color2 = 0, color3 = 0;
for (int i = 0; i < sourcePixels.Length; i += 4)
{
    color1 += sourcePixels[i];
    color2 += sourcePixels[i + 1];
    color3 += sourcePixels[i + 2];
}
Observe that we named the color variables color1, color2, and color3 – and not red, green and blue. The reason is obvious: we need to consider the encoding of the color, to avoid surprises like this:
Here’s the code:
Color color;
if (skb.ColorType == SKColorType.Bgra8888)
{
    color = Color.FromArgb(255, (byte)(color3 / nbrOfPixels), (byte)(color2 / nbrOfPixels), (byte)(color1 / nbrOfPixels));
}
else if (skb.ColorType == SKColorType.Rgba8888)
{
    color = Color.FromArgb(255, (byte)(color1 / nbrOfPixels), (byte)(color2 / nbrOfPixels), (byte)(color3 / nbrOfPixels));
}
else
{
    throw new Exception("Unsupported color type");
}

Result.Background = new SolidColorBrush(color);
Conclusion
This was our very first app with Avalonia UI, and it went very smooth. We were able to port a not-so-trivial Windows app to the Android platform with minimal effort. Beer Color Meter has room for improvement -especially in the user interface- but we wanted to stick as close as possible to our initial WinUI project. Just as with our Uno Platform version, the Avalonia UI version has less code than the original one.
Our Avalonia UI Beer Color Meter for Windows and Android lives here on GitHub.
Enjoy!
